The Disappointment Behind the 108-Megapixel Screen
You just bought a brand-new smartphone or a flashy new camera. The packaging proudly highlights a massive number, claiming a 108-megapixel sensor. You feel extremely excited because you believe your photos will now look like professional magazine covers.
Then, you take a photo indoors during a family dinner. Suddenly, your excitement fades away into pure disappointment. The image looks dark, grainy, and surprisingly blurry. Your friend’s older phone, which only has a 12-megapixel camera, actually took a much cleaner shot.
How is this even possible? It feels like a massive trick. You spent your hard-earned money based on a big number, thinking megapixels were the golden key to beautiful memories. Instead, you are left with giant files that quickly fill up your storage, and photos you do not even want to share.
Many people face this exact issue every single day. It is frustrating to realize that marketing terms can mislead us so easily. Let us break down how camera technology actually works so you can get the beautiful photos you deserve.
What is a Megapixel? (The Simple Truth)
To understand megapixels, think of them as the tiny building blocks of a digital image. One megapixel represents exactly one million individual pixels. Therefore, a twelve-megapixel camera captures twelve million tiny dots of light to construct a single photo.
When you snap a picture, these millions of dots combine to create the final image you see on your screen. Because of this, it is incredibly easy to assume that having more dots automatically leads to a sharper photo.
In reality, camera sensors do not work that way because of how light behaves. The physical quality of each individual dot matters far more than the total number of dots squeezed onto the sensor.
The Bucket Analogy: Sensor Size vs. Megapixels
Imagine you are standing outside in a rainstorm with a bucket. Your goal is to collect as much water as possible.
The rain represents light, and your bucket represents the camera sensor. If you have one big bucket, you will catch a lot of water very quickly.
Now, imagine replacing that big bucket with one hundred tiny plastic cups spread over the same area. Each tiny cup can only hold a few drops.
If a light wind blows, the water splashes out, and you get a messy, incomplete collection. This is exactly what happens when camera brands squeeze millions of tiny pixels onto a microscopic phone sensor.
The individual pixels become too small to catch enough light. To make great photos, we need to focus on how much light we can capture.
Why Sensor Size is the Real King of Photography
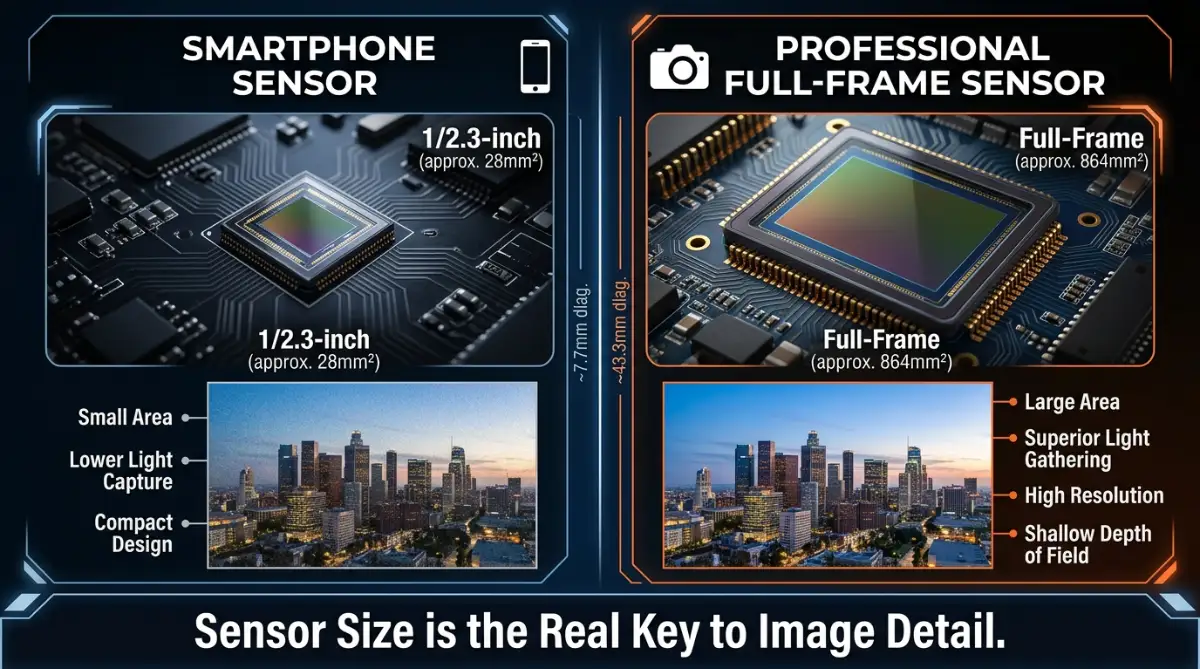
The camera sensor is the physical chip inside the device that catches light. It is the single most important piece of hardware in any digital camera.
A larger sensor can hold larger pixels. Larger pixels have more surface area, which allows them to collect more light in a shorter amount of time.
This is why a professional camera with only twenty-four megapixels will always beat a smartphone with one hundred megapixels. The professional camera sensor is physically massive compared to the tiny chip inside a phone.
If you want clean, sharp, and colorful photos, you must look at the sensor size first. Do not let high megapixel numbers distract you from this fact.
How Small Pixels Ruin Night Photos
When you take photos at night, light is very scarce. This is where a small sensor with high megapixels struggles severely.
Because the tiny pixels cannot collect enough light naturally, the camera software tries to artificially brighten the image. This digital boosting creates a lot of digital noise, which looks like ugly grain.
It makes your dark photos look muddy, soft, and pixelated. A larger sensor with fewer, larger pixels drinks in the available light naturally.
Your night photos will look clean, smooth, and highly realistic. Light is the lifeblood of photography, and bigger pixels are simply better at catching it.
Myth vs. Reality in Modern Cameras
Let us look at some common beliefs that lead to wasted money when buying new devices.
The Optical Challenge: Why Lens Glass Matters
You can have a two-hundred-megapixel sensor, but it is completely useless if the lens in front of it is poor. The lens is the physical window that lets light reach the sensor.
If the glass is cheap, dirty, or made of cheap plastic, the incoming light gets distorted. A high-megapixel sensor actually requires incredibly sharp, high-quality glass to match its high resolution.
Most smartphones use tiny plastic lenses to save space and keep costs low. These lenses cannot physically project a sharp enough image to satisfy a high-megapixel sensor.
The result is a highly detailed picture of a blurry image. You just end up saving a giant file of a soft, unsharp photo.
Image Processing: The Invisible Artist
When you press the camera button, the device does not just save raw light. It processes the data using complex software.
Different brands use different mathematical steps to color, sharpen, and clean up your photos. This is why two different phones with the exact same camera sensor can produce completely different photos.
One brand might make colors look bright and warm, while another makes them look cold and natural. Great software can make a simple twelve-megapixel photo look absolutely breathtaking.
On the flip side, poor software will make a high-megapixel photo look like a messy oil painting. The processing brain inside the camera is just as important as the hardware.
Why Giant Files Are a Huge Headache
High-megapixel photos create massive file sizes. A single high-resolution photo can easily take up forty megabytes of space.
If you take a lot of photos, your phone or computer storage will fill up incredibly fast. You will quickly have to pay for expensive cloud storage or buy external hard drives.
Sending these large files to friends via messaging apps takes much longer and consumes more mobile data. For everyday sharing, you do not need giant files at all.
A standard twelve-megapixel photo is perfect for social media, viewing on screens, and quick messaging. It keeps your devices running fast and saves your storage space.
Pixel Binning: The Secret Phone Trick
Did you know your high-megapixel phone camera rarely actually shoots at its maximum resolution? Most modern phones use a technology called pixel binning.
This process groups adjacent pixels together to act as one single, larger pixel. For example, a phone might combine nine tiny pixels into one big pixel.
This turns a ninety-six-megapixel image into a twelve-megapixel image. The phone does this because the individual tiny pixels are too weak on their own.
This means you are paying for high megapixels, but your phone is secretly giving you a lower-megapixel photo anyway to keep the quality decent. It is a clever trick, but it proves that lower megapixel counts with larger pixel sizes are superior.
How to Choose a Camera That Actually Takes Great Photos
Now you know that megapixels are not the ultimate answer. What should you actually look for when buying your next device?
Look for terms like "1-inch sensor" or "APS-C" or "Full Frame" in camera specifications. On smartphones, look for larger physical sensor sizes listed in fractions, like 1/1.3 inches.
A larger fraction means a physically larger sensor. A larger sensor will always give you better image quality, especially in low-light situations.
The aperture is the physical opening in the lens that lets light inside. It is written as an f-number, like f/1.8 or f/2.2.
A smaller f-number means a wider opening. A wider opening lets in much more light.
An f/1.7 lens will perform much better in the dark than an f/2.4 lens, regardless of megapixels. Always check the aperture value before buying.
OIS physically moves the camera parts inside to counter your shaky hands. This allows the camera to keep the shutter open slightly longer to capture more light without causing blur.
This single hardware feature is far more useful for sharp photos than having extra megapixels. It makes a huge difference in real-world everyday shooting.
Expert Tips for Capturing Better Photos Today
You do not need to buy a brand-new camera to get better results. You can easily improve your photos with a few simple steps today.
First, always clean your camera lens. A simple wipe with a soft microfiber cloth can instantly remove finger smudges that make photos look blurry.
Second, find better light sources. Turn on an extra light, step closer to a window, or move your subject into the soft shade outdoors.
Third, hold your camera with both hands to keep it steady. Rest your elbows on a flat table or use a simple tripod to eliminate camera shake.
These free methods will improve your photo quality far more than a higher megapixel count ever could. Focus on light and stability, and your photos will shine.
Mastering the Art of Light: Secrets the Pro Photographers Use
Why RAW Format Beats Standard JPEG Every Time
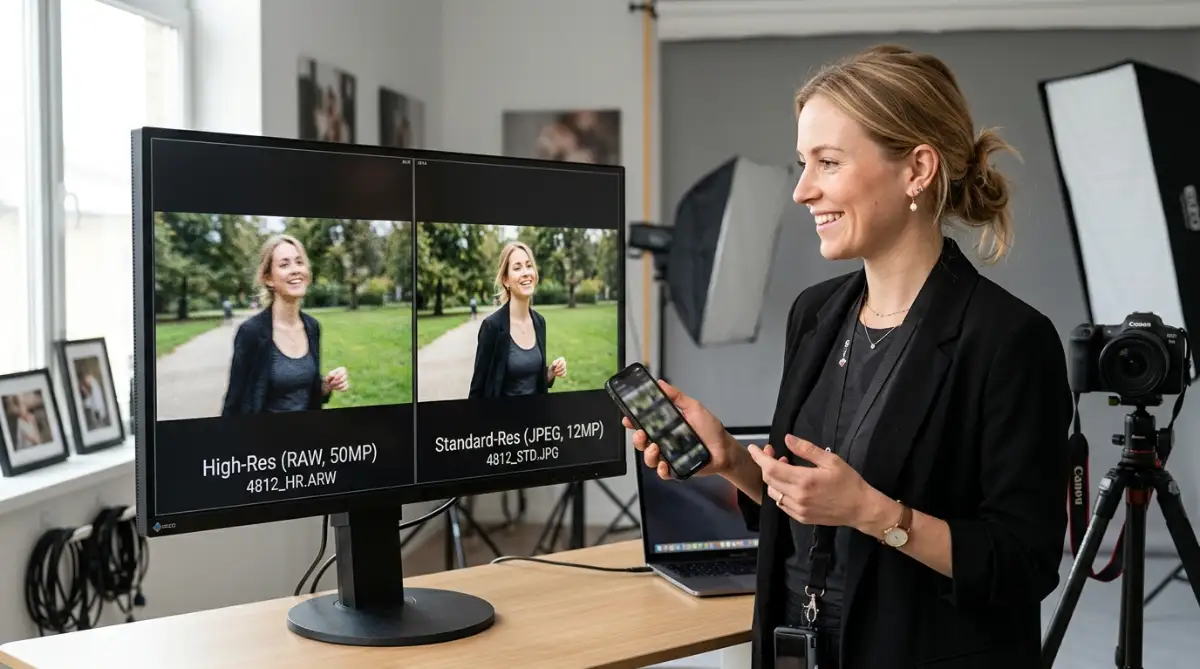
Most basic camera users simply point their device and shoot in the standard JPEG format. However, JPEG files are highly compressed and throw away a massive amount of valuable light data.
To bypass this limitation, you should switch your camera settings to shoot in RAW format. RAW files preserve every single bit of information your sensor captures, allowing you to salvage dark shadows and bright highlights later.
It gives you total control over the final look of your photo during editing. Instead of letting your camera software make bad automated choices, you make the artistic decisions yourself.
The Magic of Understanding Your Lens Aperture
Many people do not realize that every lens has a sweet spot where it performs best. If you shoot with your lens wide open, the image might look slightly soft around the edges.
If you close the lens too much, a physics phenomenon called diffraction will make the entire photo look blurry. Try shooting one or two f-stops down from the maximum aperture of your lens.
For example, if your lens goes to f/1.8, try taking your shots at f/2.8 or f/4. You will instantly notice a massive jump in the sharpness and clarity of your images.
How to Use Exposure Compensation to Save Your Highlights
Cameras often get confused when a scene has both very bright skies and dark backgrounds. This confusion can leave your main subject looking completely dark, or make the sky look like a solid white sheet.
Fortunately, you can fix this balance instantly using the exposure compensation tool. Simply look for a button or slider with a plus and minus (+/-) icon on your camera or mobile screen.
Nudging this slider toward the minus side tells your camera to capture less light, protecting your highlights. This quick change preserves natural details in bright clouds, light clothing, and skin textures.
Balancing Your ISO Settings to Minimize Digital Noise
ISO measures how sensitive your camera sensor is to the available light. When you raise your ISO to very high numbers, you allow the camera to shoot in the dark, but you also introduce digital noise.
Try to keep your ISO at its base level, which is usually one hundred, whenever possible. If you need more light, try slowing down your shutter speed or using a wider aperture first.
Using a steady tripod is a great way to keep your ISO low while keeping your shutter open for a longer period of time. This balance ensures your images remain smooth and clean.
White Balance Secrets for Rich and Natural Colors
Many automated cameras struggle to guess the correct color temperature of a room. This is why indoor photos often look too yellow, and outdoor photos can look too blue.
Instead of relying on the auto setting, manually select your white balance to match your environment. Choosing the "Cloudy" preset on a gray day will instantly make your photos look warmer and more inviting.
Choosing the "Tungsten" preset under yellow indoor bulbs will cool down the image and make skin tones look natural. Getting the color right in the camera saves you hours of frustrating color correction work later.
Protecting Your Physical Health During Long Editing Sessions
Once you capture these detailed photos, the real work begins on your computer. Editing these highly detailed photos requires hours of staring closely at monitors to fix minor details.
Staring at bright screens in dark rooms can cause headaches and tire your eyes. Learning how to relieve screen eye strain naturally can save your vision and keep your mind fresh during long editing sessions.
Make sure to take frequent breaks and look at objects far away to relax your eye muscles. A healthy photographer always takes better photos.
How Scientists Actually Measure True Image Quality
When camera scientists test how sensors gather light, they look at actual signal-to-noise ratios rather than marketing numbers. You can explore the DxOMark camera sensor testing data to see how physical sensor sizes stack up against simple megapixel marketing.
This scientific testing reveals that a larger sensor area is what truly determines how clean an image will be. Camera experts have repeatedly tried to make sensor labeling less confusing for normal buyers.
For example, you can read DPReview's analysis on sensor size to understand why physical dimensions matter much more than misleading industry names. Understanding these physical measurements will stop you from falling for deceptive advertisements.
The Common Mistakes that Ruin Your Photos and Waste Your Money
Squeezing Too Many Pixels into a Small Sensor
The biggest mistake people make is buying a device simply because it has a high megapixel number. Camera companies love to use this number because it is easy to put on a billboard.
However, cramming fifty million pixels onto a tiny phone sensor makes the pixels microscopic. These tiny pixels cannot gather enough light, leading to noisy and grainy pictures.
You end up paying more money for worse overall image quality. Always check the physical sensor measurements instead of just counting the megapixels.
Relying on Digital Zoom Instead of Physical Movement
Many users see a high-megapixel camera and assume they can zoom in infinitely without losing quality. They pinch their phone screens to zoom in on distant subjects, which triggers digital zoom.
Digital zoom is not real zoom; it simply crops the image and stretches the remaining pixels. This process throws away massive amounts of detail and makes your photo look like a pixelated mess.
Instead of zooming digitally, use your feet to walk closer to your subject. If you cannot get closer, consider buying a dedicated telephoto lens that uses physical glass to zoom.
Buying Expensive Gear Before Learning the Rules of Light
It is easy to believe that a more expensive camera will instantly make you a better photographer. People spend thousands of dollars on high-end cameras but keep shooting on fully automatic settings.
A high-resolution camera will actually highlight your mistakes rather than hide them. It will show every tiny camera shake and every poor lighting decision with perfect clarity.
Instead of buying new gear, spend time learning how light behaves at different times of the day. Learn how to place your subject relative to the sun to get soft, flattering shadows.
Ignoring Your Computer and Storage Limitations
People rarely think about what happens to their computer when they start shooting giant high-megapixel images. A single uncompressed RAW file from a modern camera can take up a huge amount of space.
Processing hundreds of these massive files can make your computer work extremely hard, causing it to slow down. If you edit on a laptop, the high processing demand will generate a lot of heat.
If you use a laptop for editing, you might want to learn how overheating slowly destroys your laptop battery so you can keep your editing machine running cool. Keep your workspace well-ventilated and consider using external storage drives to keep your main computer fast.
Keeping Your Camera Lens Dirty and Unprotected
You can have the best camera sensor in the world, but a dirty lens will ruin every single shot. Fingerprints, dust, and grease from your pockets can easily smudge the outer glass of your lens.
This smudge scatters the incoming light, making your photos look hazy and reducing the overall contrast. Many people assume their camera is broken when they actually just need to wipe the glass.
Make it a habit to check your lens before you take your first photo of the day. Use a dedicated lens cleaning solution and a soft cloth to avoid scratching the delicate glass coatings.
Your Simple Action Plan for Breathtaking Pictures
Step 1: Clean Your Lens and Check Your Settings
Before you go out to shoot, always give your camera lens a quick wipe to remove pocket lint and smudges. Open your camera settings and make sure you are shooting at the highest quality setting, or switch to RAW format.
Step 2: Hunt for the Best Light
Instead of pointing your camera randomly, look for where the light is coming from. Position your subject so the light gently illuminates their face from the side rather than from directly above.
Step 3: Focus on Stability and Framing
Hold your camera close to your body with both hands to prevent any micro-shakes. Use the grid lines on your screen to place your subject along the outer thirds of the frame for a more balanced look.
Step 4: Keep Your Editing Space Clean and Cool
When you sit down to edit, make sure your computer is placed on a hard, flat surface so the cooling fans can work properly. Take regular breaks to rest your eyes and stretch your body.
A Final Word on the Real Power of Photography
At the end of the day, a camera is simply a tool used to capture a specific moment in time. The most memorable photos in history were not famous because they had a high megapixel count.
They became famous because they captured raw human emotion, beautiful light, and a unique story. You do not need to spend thousands of dollars on the newest high-megapixel gear to tell a great story.
Focus on understanding light, mastering your composition, and practicing your skills every single day. Your pictures will improve dramatically, and you will find joy in the creative process.
Important Photography Disclaimer
Disclaimer: The information provided in this article is for educational and informational purposes only. Photography results can vary based on individual skill level, environmental lighting conditions, and the specific limitations of your camera hardware. All product names, logos, and brands mentioned in this article are the property of their respective owners, and their mention does not imply any official endorsement or commercial partnership.