Overcoming the Hurdles of Traditional Video Production
You want to start making videos, but looking at a professional creator's gear list makes your wallet cry. It feels like you cannot even start unless you spend thousands of dollars on cameras, heavy lights, and microphones. But here is the truth: you do not need any of that gear to share your ideas and build a real audience. Today, free AI and automation tools can handle the hard work while you focus on what actually matters—your story.
This major hurdle keeps thousands of passionate storytellers from sharing their ideas online. The traditional process of making just one short video can take days of stressful manual labor.
- You spend hours trying to get the lighting right in a cramped bedroom.
- Your computer freezes and crashes while trying to save simple video files.
- You feel shy or unnatural whenever you try to speak directly to a camera lens.
- You spend your whole weekend editing out small mistakes and background noises.
Why is finding an easy entry point so difficult for beginners? Let us look at the real issues that stop people from producing consistent video content:
- The High Cost Barrier: Professional editing software and camera packages cost a fortune.
- Misleading Software Ads: The internet is full of tools that claim to be free but hide your video behind huge watermarks.
- Steep Learning Curves: Most editing platforms look like airplane cockpits, taking months of study to master.
- Time Consuming Workflows: Writing, shooting, and editing a single piece of content can quickly turn into a full-time job.
These technical hurdles can sometimes slow down your creative progress. However, once you learn to work around them, you can build a consistent creation habit without losing your excitement.

- You feel disappointed when a video you spent hours on does not get noticed.
- You wish your visual style matched the high quality of your ideas.
- You spend too much time on technical details instead of enjoying the actual storytelling process.
- You hesitate to publish your work because you want your simple editing style to look cleaner.
Let us be completely honest with each other. You do not need an expensive production team to share your message, but you do need smart, modern systems that help you create without the headache.
Quick Summary: What You Will Learn
If you are short on time, here are the main ideas we cover in this guide:
- Zero Equipment Needed: You do not need expensive cameras; free AI tools can turn your written text into high-quality visual scenes.
- Step-by-Step System: Learn how to write short scripts, choose the right AI video generator, and scale up your final video resolution.
- Avoid Common Pitfalls: Why you should never upload raw, unedited AI content and how sound design makes your videos look professional.
- Workflow Secrets: How to batch your scripts and build consistent visual styles to save hours of editing time every week.
The Beginner Guide to Creating Professional Videos Without a Camera
Automating your video production is not about making cheap, robotic clips that people ignore. It is about using modern technology to handle the heavy lifting so you can focus entirely on your core message.
Let us explore the first three highly practical steps to move from a blank screen to a finished video using free tools.
Step 1: Drafting Your Script and Defining Your Visual Goal
Before you open any editing tool, you must realize that a great video always starts with a solid script. The most beautiful visuals in the world will not save a video that has a boring or confusing message.
Think of your script as the solid concrete foundation of a house. If your foundation is weak, the entire structure will collapse, no matter how pretty you paint the walls.
To make this step easy, you can structure your script into three simple parts:
- The Hook (0 to 5 Seconds): Use a powerful opening sentence that stops viewers from scrolling.
- The Value (6 to 50 Seconds): Deliver your promise with two or three engaging points.
- The Call to Action (51 to 60 Seconds): Tell your audience exactly what to do next.
Suppose, who wanted to share simple gardening tips but hated writing long scripts. He started using a basic framework where he answered one common gardening question in under sixty seconds.
By writing down his thoughts in a conversational style first, he knew exactly what visuals he would need later.Keep your sentences short and active. This makes it much easier for automated voice tools to read your text naturally without sounding stiff.
Step 2: Selecting the Perfect Free Engine for Your Specific Format
Once your script is ready, you need to match your topic with the right automated tool. Not all generators are built for the same type of content.
If you choose the wrong tool for your style, you will waste hours trying to force the software to do something it was not designed to do.
Let us look at the three main types of free tools available to you:
- Talking Avatar Tools: These create a realistic digital presenter who speaks your script with natural mouth movements.
- Text-to-Video B-Roll Generators: These search massive libraries of stock footage and automatically match clips to your written sentences.
- Stylized Art Generators: These create unique, artistic animations or cartoon styles based purely on your text descriptions.
Think of this like choosing the right vehicle for a trip. You would not drive a massive truck to navigate tight city streets, and you would not take a tiny scooter on a muddy mountain trail.
If you are running a business channel, a professional digital presenter tool might be your best choice. If you are telling deep historical stories, an art or stock footage matching tool will build a much better atmosphere.
Choosing Your AI Tool Style
Here is a simple breakdown of the main tools you can use depending on your goals:
Spend a few minutes testing the free tiers of different platforms to find one that feels intuitive to use. Make sure the tool allows you to export your files in a high-definition format without placing a giant, distracting logo over your work.
Step 3: Translating Text Prompts into Captivating Visual Scenes
Now comes the fun part where you watch your words turn into moving pictures. To get the best results, you must learn how to write clear descriptions for your visual scenes.
When you use an automated system, you are acting as the director of a movie.
You need to give your digital crew clear, specific instructions so they can capture your vision accurately.
- Instead of writing "a car," try writing "a red vintage sports car driving down a sunny coastal highway at sunset."
- Instead of writing "a person working," try writing "a focused young designer sketching on a tablet inside a cozy, modern coffee shop."
- Instead of writing "cool background," try writing "soft, out-of-focus neon lights with gentle particle effects."
This descriptive writing style is the key secret to getting high-quality results from free tools.
The software uses your descriptive words to search its database and find the absolute best match.
If the first result is not perfect, do not get discouraged. Adjust your descriptive words slightly, change the lighting keywords, or try a different camera angle term.
By building your video scene by scene, you maintain complete creative control over the final product.
Quick Formula for Writing Better Prompts
If you struggle to get the right visuals from your tools, try using this simple formula:
[Subject] + [Action] + [Environment/Setting] + [Lighting Style]
- Bad Prompt: "a man in an office"
- Good Prompt (using formula): "A tired office worker typing on a laptop, messy desk with coffee cups, cozy afternoon sunlight through a window."
You will soon have a stunning, high-resolution video file ready to share with the entire world, all without touching a physical camera.
Designing a Professional Workflow to Save Hours of Work
Once you feel comfortable with the basic steps, you can set up a simple production pipeline to speed up your creation process.
The secret to publishing consistent content is having an organized system that prevents creative blocks.
Create a Central Idea Dashboard
Do not rely on your memory to store video ideas. Set up a simple digital notebook on your phone or computer to write down thoughts as they come to you.
Whenever you see an interesting article or read a helpful social media post, save a link to your notebook.
This habit ensures that you always have a long list of topics ready to go when you sit down to create.
Build Templates for Your Video Elements
You can save a massive amount of time by using the exact same style templates for your intros, subtitles, and outro screens.
Once you find a font and color scheme that looks clean and professional, save those settings in your favorite software tool.
- Use high-contrast colors for your captions so they are easy to read on mobile screens.
- Keep your intro graphics under three seconds to prevent viewers from losing interest.
- Use consistent branding elements so your audience instantly recognizes your videos.
This design consistency makes your channel look highly professional, which helps build trust with new viewers.
Batch Your Content Production
Instead of making one video from start to finish, try working in batches. Spend one afternoon writing three or four scripts at once.
The next day, use your software tools to generate all the visuals and edit the clips together in one session.
Working this way keeps your brain in a single creative mode, which makes you much faster and more efficient.
By setting up these simple workflows, you can easily produce multiple high-quality videos every week without burning out.
Key Tips to Keep Your Video Content Engaging and Safe
Using modern creation tools is a powerful shortcut, but you must use them responsibly to succeed online.
To build a loyal audience and pass strict monetization reviews, keep these final points in mind.
Focus on Adding Unique Value
Do not just copy and paste generic text into a generator and publish the direct output.
The internet is already full of boring, repetitive automated videos that nobody wants to watch.
Add your own personal stories, unique opinions, or local examples to your scripts to make your content truly stand out.
Your unique human perspective is what keeps people coming back to your channel week after week.
Respect Intellectual Property Rules
When using free tools, always make sure you have the legal right to use the generated video clips and audio tracks.
Avoid using copyright-protected music or famous movie clips without proper permission.
Using royalty-free audio tracks and original visual prompts keeps your account safe from sudden copyright strikes.
This clean approach ensures that your channel remains eligible for ad monetization and partner programs.
By pairing the speed of automated tools with your unique human creativity, you will build a powerful video channel on a very low budget.
You will finally have the freedom to share your voice, grow your audience, and build a successful digital brand.
Next-Level Workflows to Streamline Your Video Creation
Once you have mastered the basics of generating video clips from text, you are ready to explore the professional tactics used by top digital creators. Building a consistent upload schedule is key, and understanding the core principles of video production strategies helps you plan your uploads without getting overwhelmed.
Recent industry data highlights that over eighty-five percent of businesses use video as a major outreach channel to connect with audiences. According to recent video marketing insights, visual storytelling continues to drive the highest engagement rates on social media.
Now, let us examine two advanced steps that will make your content stand out from the crowd.
Step 4: Smart Audio Syncing and Voice Clone Integration
A great video is only half complete without high-quality audio. If your voiceover sounds robotic or does not match the emotion of your scenes, viewers will leave your video in seconds.
Modern free tools now allow you to clone your own voice or choose highly expressive, human-like voice models. These advanced systems analyze your script and automatically add natural pauses, breathing sounds, and correct emotional emphasis.
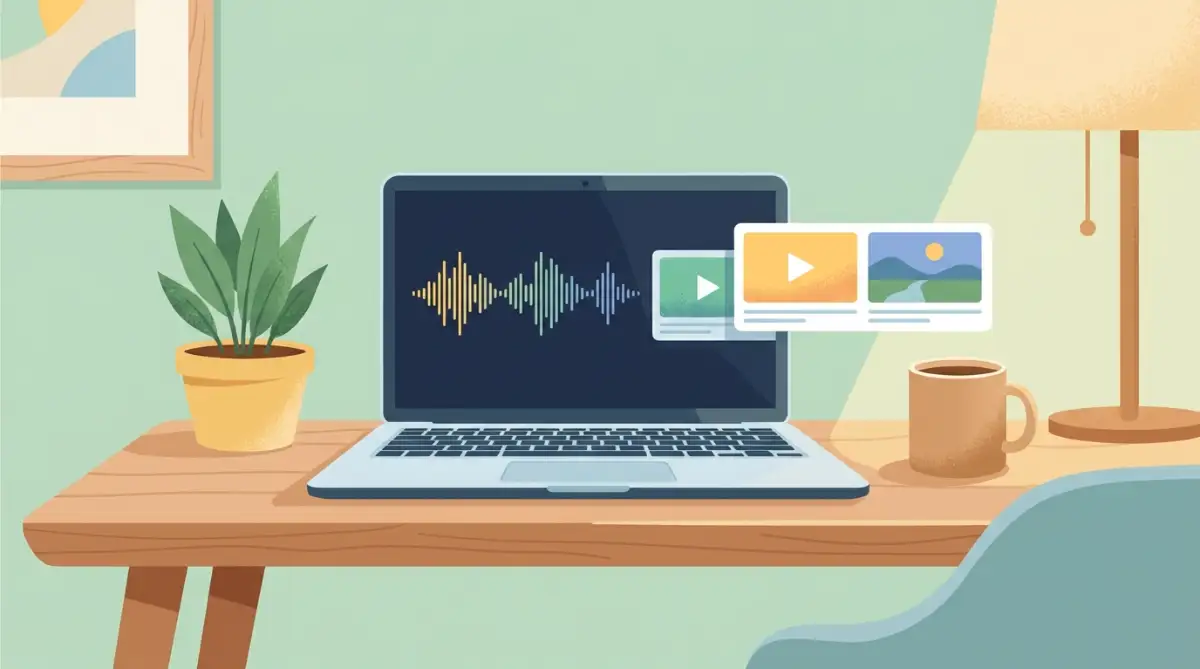
For example, imagine Robert, who wanted to teach coding tutorials but had a very quiet speaking voice. He used a free voice engine to generate a warm, clear narrator voice for his videos.
By syncing this high-quality audio with his generated screen recordings, his audience retention rate doubled in just one week.
To do this right, always choose an audio tool that lets you adjust the speed and pitch of individual words. This tiny manual adjustment makes your voiceover sound incredibly authentic.
Step 5: High-Impact Video Upscaling and Custom Styles
Many free video generators export clips in lower resolutions like 480p or 720p to save server power. To compete with professional creators, you need to turn these soft, blurry clips into sharp, high-definition videos.
You can use free video upscalers to boost your video resolution to 1080p or even 4K. These smart systems analyze your clips and automatically fill in missing pixels to make details look clean and sharp.
- Apply a Consistent Color Filter: Use a free editor to apply a uniform color tone across all your generated scenes.
- Add Subtle Film Grain: A tiny amount of digital film grain hides low-quality textures and makes your video look like real movie footage.
- Match Your Styles: If your first scene is a cartoon, make sure every following scene follows that exact same artistic style.
Think of Amina, who runs a popular travel channel. She generated beautiful clips of historical cities but they all looked slightly different in lighting and quality.
By running her clips through a free upscaler and applying a warm vintage color filter, she made the entire video look like a high-budget documentary.
How to Keep Your Visual Content Fresh Over Time
Staying relevant in the digital space means keeping your style fresh and engaging. If you use the exact same templates and stock styles for every video, your audience will quickly get bored.
Make it a habit to explore new art styles, like clean line art, futuristic neon themes, or soft watercolor animations.
Store your favorite successful prompts in a simple document on your computer.
This helps you build a personal library of visual recipes that you can reuse to get fast, predictable results.
Critical Pitfalls That Stop Creators From Growing
Even with the smartest automated tools, making simple workflow errors can ruin your growth plans. Let us look at the five most common errors that can get your channel penalized or ignored.
This negative cycle usually moves from a lack of editing to a generic look, which causes low viewer retention and ends in lower search rankings.
1. Publishing Pure, Unedited Outputs Direct From the Generator
The biggest mistake is uploading a video file exactly as it comes out of the generator.
These automated tools often leave small visual mistakes, like distorted hands, weird background movements, or awkward transitions.
If you do not trim these errors out, your viewers will notice them instantly and think your channel is lazy or low-effort.
2. Neglecting Your Audio Quality and Sound Design
A stunning visual with terrible, dry sound will make people close your video in a heartbeat.
Many beginners forget to add soft background music or simple sound effects like whooshes and clicks.
These tiny audio additions make your transitions feel natural and keep the viewer's brain engaged.
3. Using Copyrighted Sounds and Protected Brand Assets
When using free systems, you must ensure you have the full legal right to share the final output.
Using copyrighted pop songs or famous corporate logos can lead to sudden copyright claims.
In some cases, this can result in your video being muted, blocked, or your entire account being deleted.
4. Creating Videos Without a Clear Audience Platform Format
A video format that works perfectly on a desktop screen will usually fail on a mobile phone.
If you publish horizontal wide-screen videos on a vertical short-form platform, viewers will skip them instantly.
Always select the correct aspect ratio in your software settings before you start generating your clips.
5. Relying on Boring, Outdated Title Ideas
Even the most beautiful video will fail if nobody clicks on it in the first place.
Many creators spend five hours making a video but only five seconds thinking of a boring title.
Spend time crafting catchy, simple headlines that spark curiosity and make people want to click.
Your Journey to Stress-Free Visual Storytelling Starts Now
Automating your video production is a powerful way to share your voice without needing a huge budget.
It takes away the heavy worry of expensive gear and lets you focus completely on your unique ideas.
By using simple scripting steps, choosing the right free tools, and avoiding basic mistakes, you can build a highly active audience.
You do not need to be a tech wizard or have professional design training to begin.
You just need to take that very first step of writing down one simple script today.
Once you see your words turn into beautiful moving pictures, you will never want to go back to the old, stressful way of editing.
Start your creation journey today, and share your unique stories with the world.
Disclaimer: The information provided in this article is for educational and informational purposes only. It does not constitute professional business, marketing, or legal advice. Please consult with a professional advisor or check the terms of service of each software tool before using them for commercial purposes.